 Supplemental Lessons
Materials and Equipment:
Computers w/ DrRacket or WeScheme
Student folders
Design Recipe Signs
Types | Functions |
Number | + - * / sq sqrt expt |
String | string-append string-length |
Image | rectangle circle triangle ellipse radial-star scale rotate put-image |
Boolean | = > < string=? and or |
Position | make-position |
Manipulating Images(Time 20 minutes)
This section gets kids doing more than one level of circle, thus fitting contracts together and practicing the substitution model. You can get them to practice more than one level of circle using non-image things like (* 2 (+ 3 4)) and (+ (string-length "cat") 5), but changing images may be more compelling.
Of course, you can do more with your images than just create them!
There are also functions that allow you to stretch, scale and even rotate them!
Here are contracts for some functions that allow you to do this. Copy them into your notebook, and try to do the following exercises with a partner:
; flip-horizontal : Image -> Image ; flip-vertical : Image -> Image ; scale : Number Image -> Image ; scale/xy : Number Number Image -> Image ; rotate : Number Image -> Image ; overlay : Image Image -> Image Let kids experiment with these functions and point out interesting results to the class
Experiment with the functions you just learned!
If you’d like more exercises involving images and more complex composition, check out the supplementalFlags Activity.
Making Flags(Time 30 minutes)
Let’s look at the code that’s in this file...
First, you’ll see that there’s a definition called red-dot, which is a solid red circle of radius 50.
There’s also a definition for blank, which is a 300 x 200 rectangle that is outlined in black".
To make the flag of Japan, we want to place a red circle right in the middle of our flag. If our flag is 300 wide by 200 high, what coordinate will put us right at the center? 150, 100
What should the radius of our circle be? What code will generate this circle? (circle 50 "solid" "red")
Let’s go through the next exercise together.
Okay, so I’ve got my background image, flag, and I’ve got the image I want to place on it. Scheme gives us a function called put-image, which lets us do exactly that!
; put-image: Image Number Number Image -> Image ; places an image, at position (x, y), on an Image Let’s set up some code, and then fill in the blanks:
(put-image _____ __ __ ______)
A circle!
(put-image (circle 50 "solid" "red") __ __ _______)
Numbers!
They represent the x and y coordinates for where we want to place the image of the circle. What did we determine were the coordinates for the center of the circle? Let’s fill them in!(put-image (circle 50 "solid" "red") 150 100 ______)
Finally, we need to give put-image another image. In our case, that’s going to be our rectangle.
(put-image (circle 50 "solid" "red") 150 100 (rectangle 300 200 "outline" "black")) Okay, so let’s define this whole expression to be a variable, so we can use it later. What is a good name for this variable?
(define japan (put-image (circle 50 "solid" "red") 150 100 (rectangle 300 200 "outline" "black"))) Now let’s click Run and evaluate japan. What do you think we will get back?
We can actually make this a little more elegant, by using the power of define. Since we’ve already defined our circle as red-dot and our rectangle as blank, we can replace that code with the variable:
(put-image red-dot 150 100 blank) Click "Run" and see if japan still does the right thing. How can we use flag to make the code even prettier?
Look at the picture of the Somalian flag. Think about what shapes will you need to make this flag. Which colors will you need? Try making the flag.
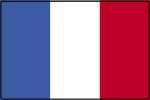
Look at the picture of the Polish flag. Think about what shapes will you need to make this flag. Which colors will you need? Try making the flag.
If you have time, try these other flags!


red-shape(Time 20 minutes)
Now let’s get a little closer to what we’ll want in our games. Instead of returning a number, you’re going to return an image. The steps are going to be ALMOST the same as the ones we took for Luigi’s Pizza, but the output values aren’t going to be as simple as writing a number. Instead, you’ll have to write the code to create an image.
We’re going to give you 10min to figure this out, and it will be a team competition. Each team is allowed to ask the staff three questions, so be sure to think carefully before you ask.
When I say go, you’re going to turn to Page 36, and start working on "red-shape".
GO!
(define (red-shape shape) (cond [(string=? topping "circle") (circle 50 "solid" "red")] [(string=? topping "triangle") (triangle 200 "solid" "red")] [(string=? topping "star") (star 70 "solid" "red")5] [(string=? topping "rectangle") (rectangle 100 50 "solid" "red")]))
Have the player drawn differently when they get a power boost
Open doors when the player is holding a key
Move differently depending on keyboard input
You’ll be using conditions in your game to move the player up or down, depending on what the user does.
Structs(Time 20 minutes)
Display one student’s code on the projector, and draw the class’s attention to the update-danger function.
; update-danger : Number -> Number ; takes in object's x-coordinate and returns the next one Right now, update-danger takes in the object’s x-coordinate and produces the next x-coordinate for the object. This allows our object to move left or right, but does not allow it to move up and down or along the diagonal.
Draw a screen, add and label a point for the object
Suppose my object is sitting in the center of our screen at (320, 240). I want it to move diagonally so both the x and y increase by 10. What would the new coordinates be?
Have students discuss this and then write in the new coordinate.
What would have to change about our function?
Allow students to discuss this and try to guide the discussion towards the importance of returning both an x- and a y-coordinate.
The problem is, a function can only return one value. What is that value, according to our contract? A number! So we have to choose whether that number stands for a new x-coordinate or a new y-coordinate, but it can’t stand for both.
However, Racket actually allows us to create new kinds of data that can contain more than one thing. These kinds of data are called structs, and a struct can be made up of any combination of data you can imagine!
Monitors off!
Open a new blank program on the projector.
One kind of struct that is useful to us is called a position, which Racket abbreviates posn.
A position contains two numbers: an x- and a y-coordinate.
How do you think I would make a position at 400, -50?
Students guess that you will get 4 back. That’s right!
I get back exactly the value I typed in, because values evaluate to themselves.Students guess that you will get "hello" back. That’s right!
I get back exactly the value I typed in, because values evaluate to themselves.Students guess that you will get true back. That’s right!
I get back exactly the value I typed in, because values evaluate to themselves.Now, what do you think will happen if I type in (make-posn 400 -50) and hit enter?
Allow students to brainstorm. Hit enter, and then remind them:
I get back exactly the value I typed in, because values evaluate to themselves.The moral of the story is, Structs are Values, just like Numbers, Strings, Booleans and Images.
Have students turn their monitors on and practice making posns for different coordinates. Can they make a posn for each of the four corners of their game screen?
Let’s look back at our example - can you make a posn for the original position of the object? What about the new position? (Answer: (make-posn 330 250))
Everything we know about Racket still applies, so I could also write this as: (make-posn (+ 320 10) (+ 240 10))
Grab a Design Recipe Worksheet
The problem with returning a number is that we could only update the X or Y coordinate. But if we return a Posn instead, we can update BOTH.
How should our contract change? The Domain is two numbers, and the Range should be a Posn, instead of a number.
What about our examples? Well, we’ve already got one of them on the board. (update-danger 320 240) should give us back a (make-posn (+ 320 10) (+ 240 10)).
Can you write another example, using a different starting x and y?
What should our function header be, so it matches our new contract? And what about the function body?
Have students click ’run’ - the game should run as normal, except for their object moving in two dimensions! Then once students have gotten their objects to move in two dimensions, ask them how they might modify the update-target and update-projectile functions to do the same.
What about update-player? How does the contract need to change to allow the player to move in two dimensions? The function header?
Right now, both branches of the cond statement return numbers. We need to fix that so they return posns instead. Remember that the x-coordinate isn’t changing at all, so these posns should only be adding to or subtracting from the y-coordinate.
But suppose we would like the player to also move left and right. How could we add branches for the "left" and "right" keys?
Allow students to fiddle with this code. When they are done, they should have solid, two-dimensional movement for all of their game characters.
If you want your other characters to move in 2-dimensions, you can look to Page 34 and Page 35 to think about how to convert the rest of your game to use Posns.
Simple Ideas, Easter Eggs, and Advanced Challenges(Time variable)
Diagonal movement keys, second set of faster movement keys, etc.
Player disappears and reappears using some key with (- 10000 y) in update-player, or a real cond to be safer.
Bounding-box collide for oblong characters: if your characters are nowhere near circular, you may want to change to a bounding box version of collide? , where line-length in x isn’t too big and line length in y isn’t too big, separately, with different definitions of too-big for the two dimensions.
You can make multiple Dangers or Targets by defining a list of them. Introduce students to Racket’s (list ...) by making a list of two copies of the current target for them. Two will appear onscreen!
The (random upper-bound) function can be used for random speeds, random delta-y with constant delta-x (or vice versa), for "t" meaning "teleport to a random spot on screen" in update-player, etc.
Get the target or danger to slow down as it comes across the screen by making its speed depend on x.
Black holes: put black spots on the background image and use distance inside onscreen to check that you’re not too close to one of these.
Walls: put walls on the background and make update-player respect them.
Safe Zone: put a green box or green shading somewhere on the background. Change collide? so that if you’re in it, you never collide.
Make the player move diagonally towards or away from center: hard!
Get the target or danger to move in a sine wave pattern (hard! have to play with amplitude and keep track of the y offset – sine is in degrees (though sin is in radians) so the phase should be okay.)
Getting things done!(Time 20 minutes)
finish graphics
update-danger
update-target
update-player
update-projectile
offscreen?
distance?
collide?
sales pitch
In the rows of the grid, write down the names of the students in each team.
Select one team to use as an example, and have them open their game on their computer. Systematically go down the list, asking that they have finalized their graphics, written their update functions, and so on.
At each step, place a checkmark at the appropriate grid square.
Explain to students that their goal is to get all of the check marks by the end of the day.
As teams complete their games, stop the class and have them look at the finished game. Build excitement for having the class finish by giving finishing teams a round of applause, or by giving them sticker, button, or something else signify that they have finished the project.
The positive peer pressure this environment creates, coupled with the concrete feedback of the grid, is a great way to keep kids focused and on task.
Programming Olympics!(Time 20 minutes)
Divide the class into groups of roughly six students each. This can be done by gender, by grade, at random, or by any other criteria you see fit. However, it is important that both teams have similar mixes of strong and struggling students.
Every student on a team must participate in at least one event.
Once a student has signed up for an event, they may not switch.
All correct answers are worth one point, and points will only be deducted for violations of the rules.
Any notes taken during the semester may be used by the student who took those notes.
Guess that Contract: students are given a function, and asked to guess the contract for that function. (Stresses the importance of naming, note-taking, and reviews basic data types.)
Find the Bug: students are given examples of buggy code, which can be drawn from the exercises in earlier lessons or from real examples of mistakes your students have made during the semester. Students must identify the bug and fix it for an additional point.
Design Recipe Relay: a true team event, in which students are given a word problem, and the first competitors must successfully deduce the contract. The students then have a contract and purpose statement over to the next competitors on their team, who must devise two test cases to be written for the function. Finally, this information is headed to the last set of competitors, who must write a function that satisfies the contract and passes all tests cases.
Code Whispering: students are shown a strange function, with no contract or purpose statement and gibberish for both the function name and variable names. Students must figure out first what the name of the function is, then how many inputs it takes, then what types of those inputs are based on how they are used in the body of the function. Each one of these answers can be valued at one point. Finally, students must explain what the function does, suggest a new name, and use the function in an example to demonstrate their correctness.
Fill in the blank: students are given functions and their contracts, but some part of the function is missing. Compete, Jeopardy-style, for who can fill in the parts fastest.